As an architect with over a 3 years of residential design experience, projects often begin long before the first line is drawn. This two-bedroom addition was no exception.


Initial Meeting: Understanding the Need
I first met the homeowners on-site on a late afternoon. They had lived in their home for nearly 30 years and had outgrown it. With children getting older and one parent transitioning to remote work, they needed two additional bedrooms—functional, well-lit, and seamlessly integrated with the existing structure.
During our discussion, I focused on three core areas:
- Program Requirements – Bedroom sizes, closet capacity, natural light preferences, ceiling height, and whether they wanted direct access to a bathroom.
- Budget and Timeline – Establishing realistic construction expectations.
- Design Intent – Whether the addition should blend invisibly with the existing house or subtly express itself as a modern extension.
They wanted the addition to feel original to the house, no obvious “add-on” appearance.
Site Assessment & Field Measurements
At the next visit, I performed a comprehensive site and building assessment:
- Measured the existing structure: wall lengths, ceiling heights, window placements.
- Verified foundation type and floor elevation.
- Located load-bearing walls and roof framing direction.
- Checked setbacks and zoning compliance.
- Identified utility locations (sewer, water, electrical panel).
I documented everything carefully, including photographic records. Accuracy at this stage prevents expensive revisions later.
As-Built Drawings
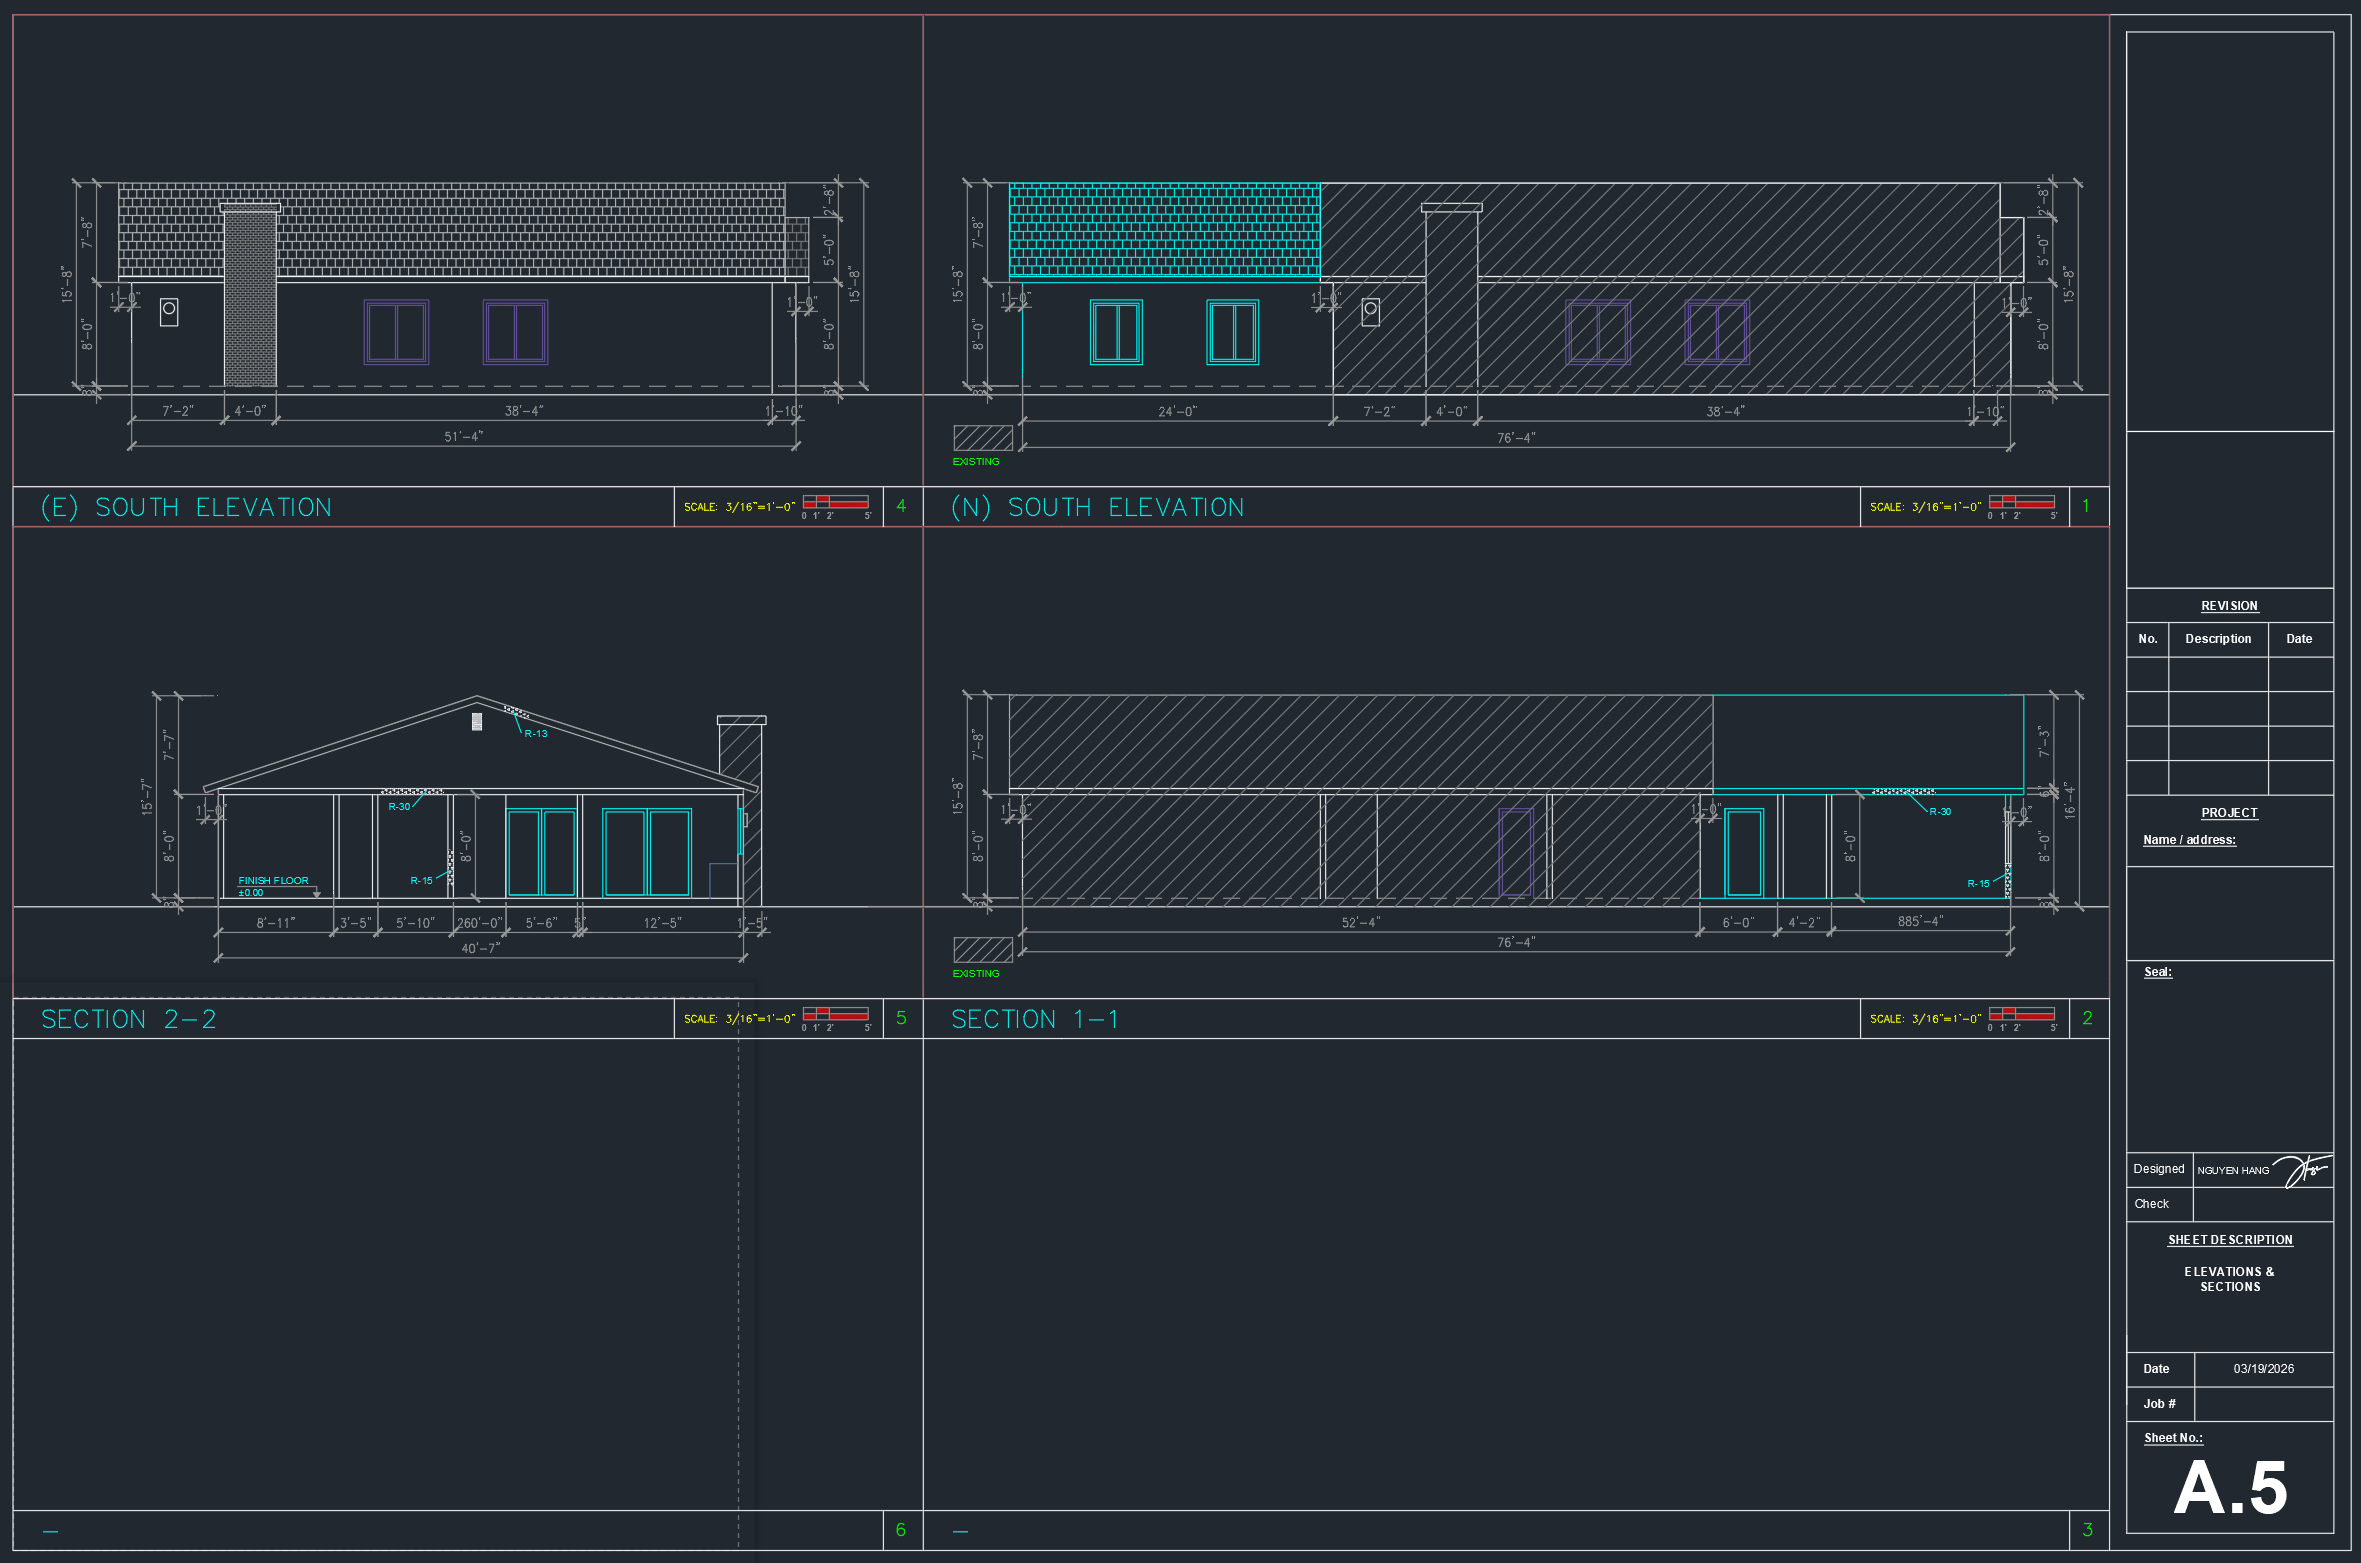
Back in the office, I drafted a complete set of as-built drawings:
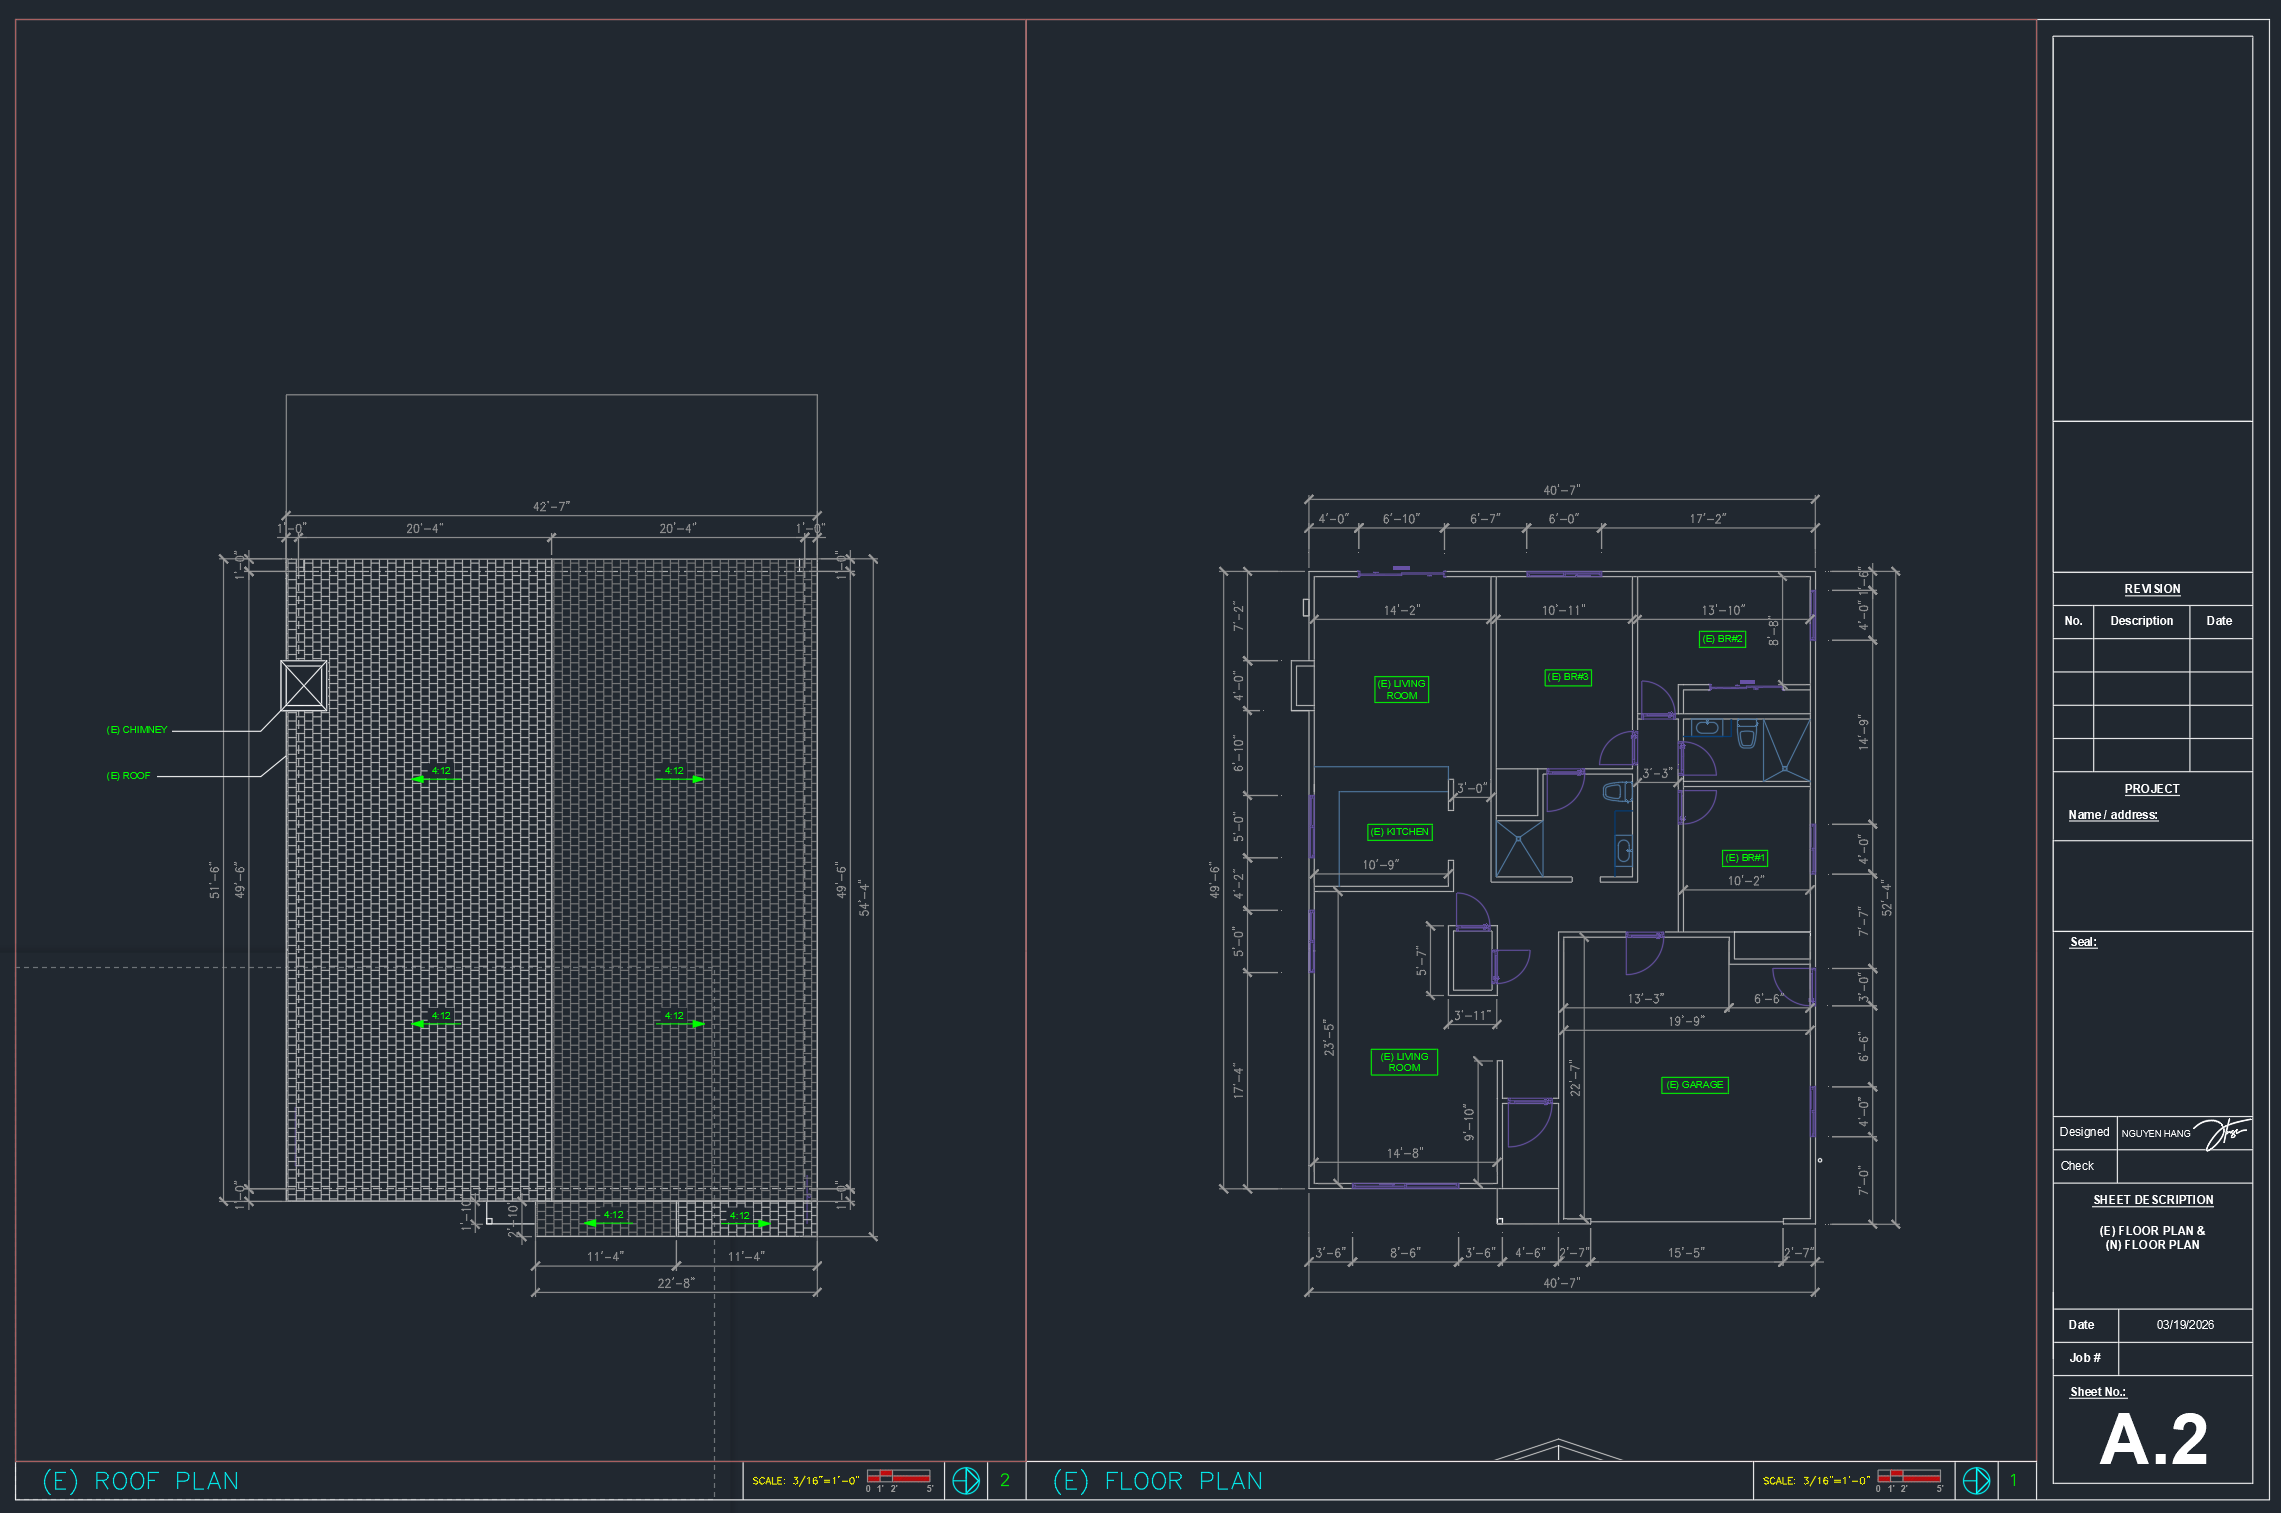
- Existing floor plan
- Exterior elevations
- Roof plan
- Building sections (if needed to understand structural relationships)
This step allowed me to identify structural constraints and potential tie-in points for the new addition.
Key discovery:
The rear wall where the addition would connect was partially load-bearing. Any opening required structural header calculations and likely foundation reinforcement.
Conceptual Design Development
I developed three layout options:
Option A: Linear extension directly behind the house
Option B: L-shaped wraparound to preserve backyard flow
Option C: Slight offset to create a small private courtyard between old and new construction
After presenting the options, we selected a refined version of Option B for cost efficiency and construction simplicity.
Design Strategy
To make the addition feel integrated:
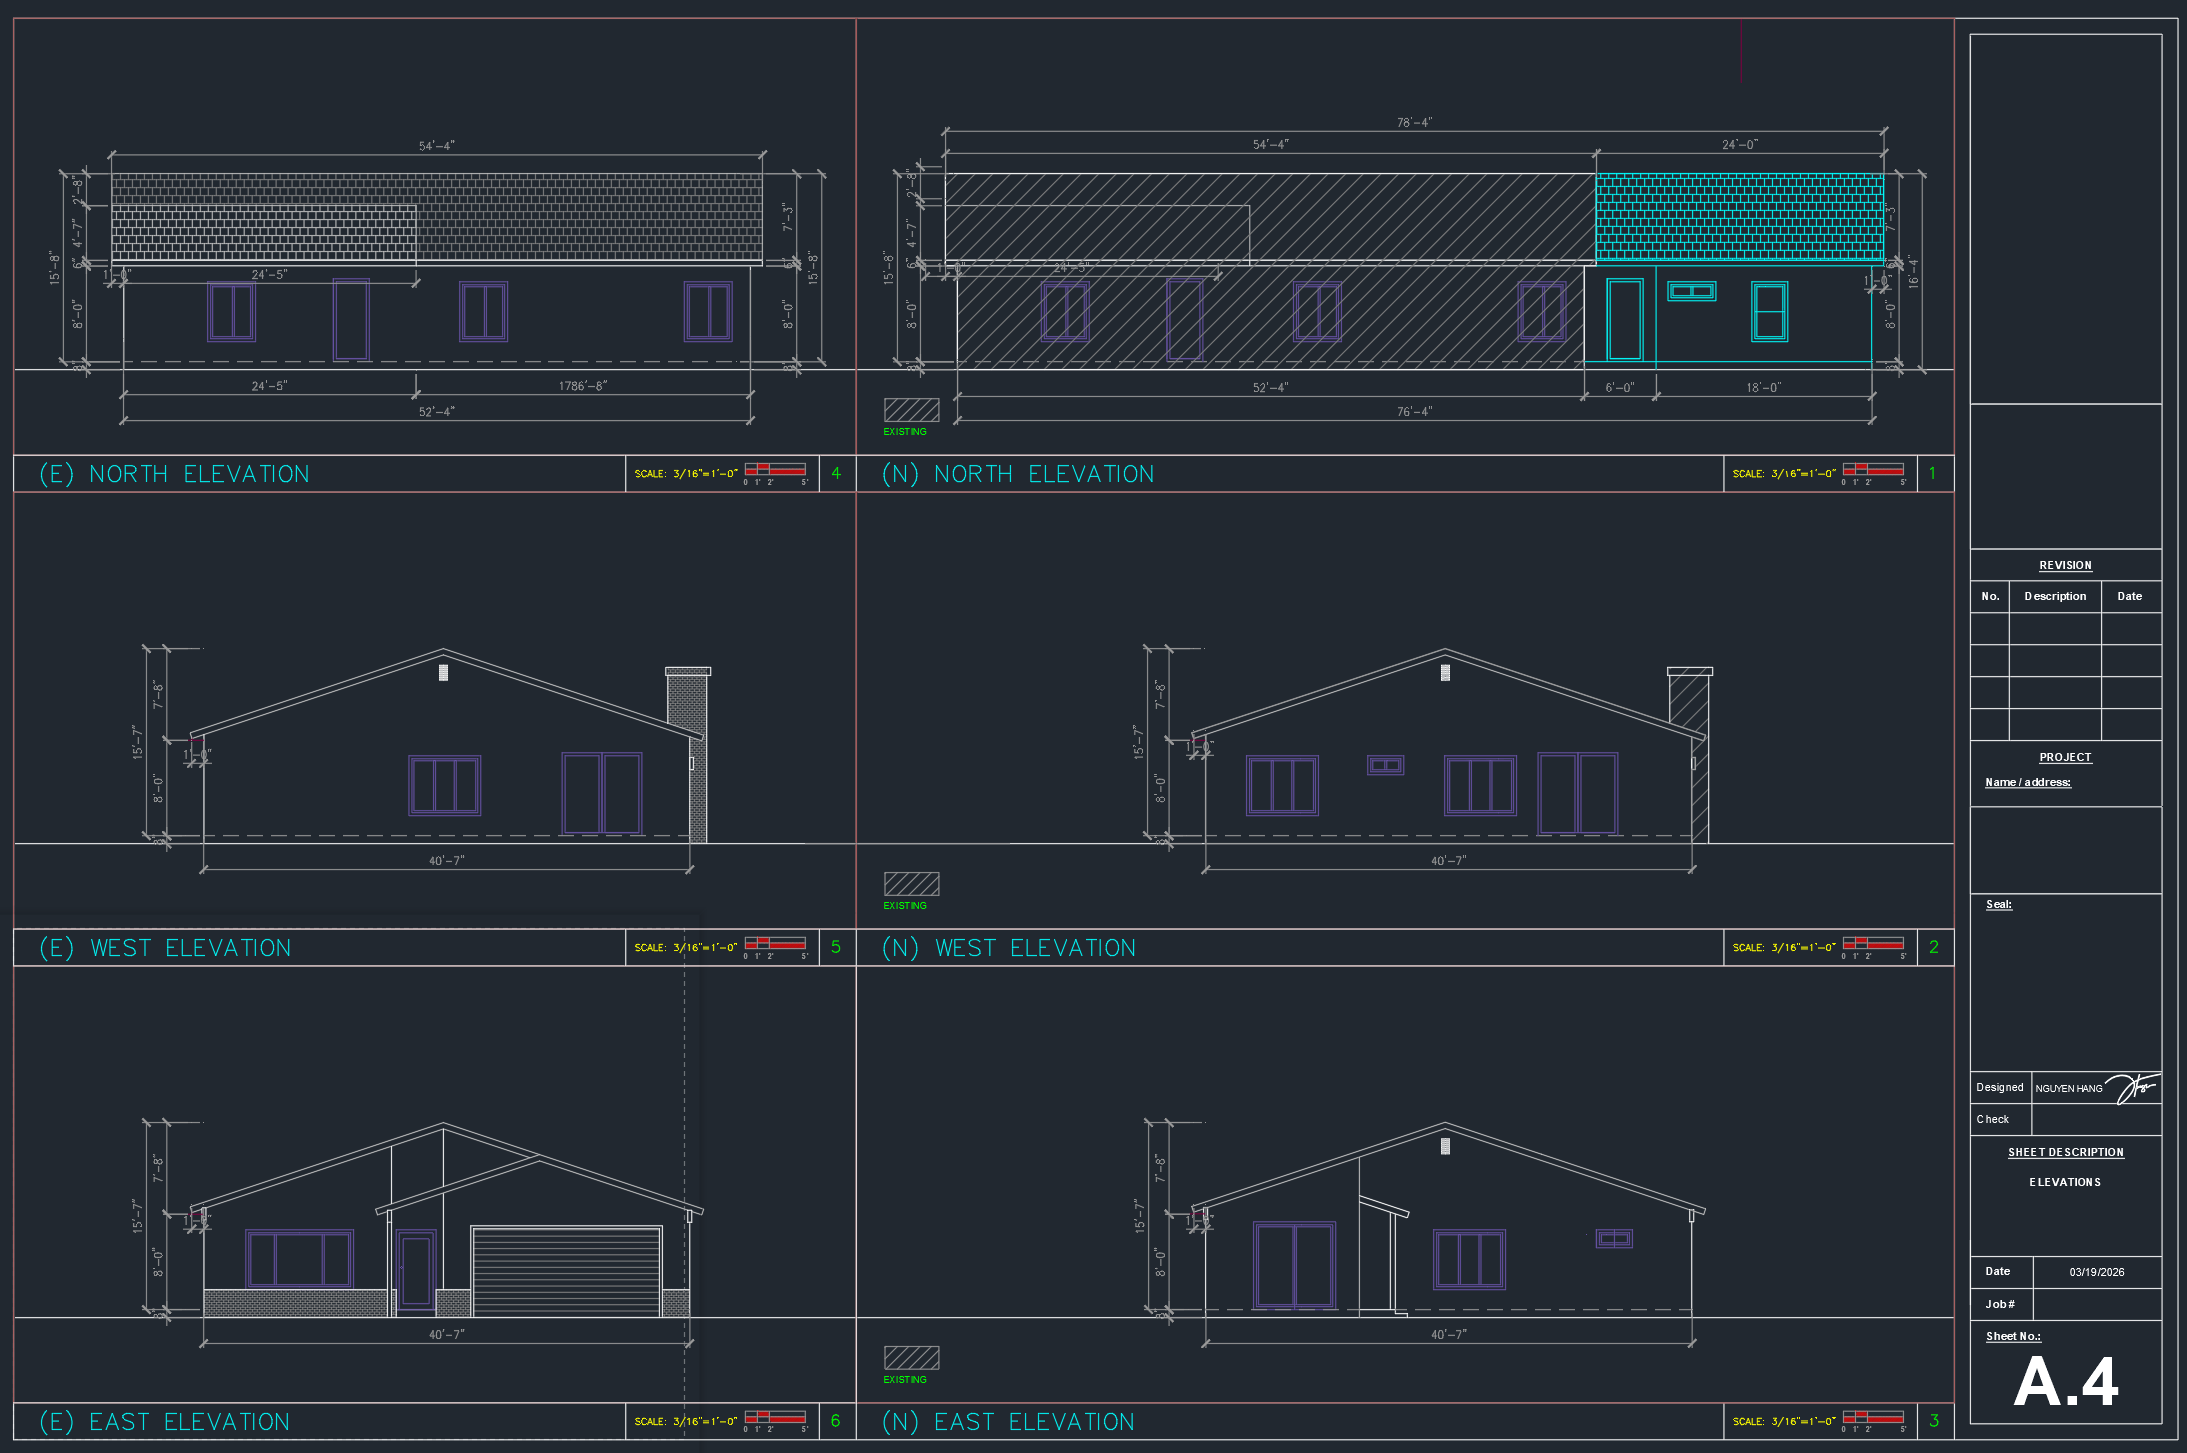
- Matched existing roof pitch and eave depth
- Continued exterior materials and window proportions
- Aligned new hallway with existing circulation path
- Maintained consistent ceiling height
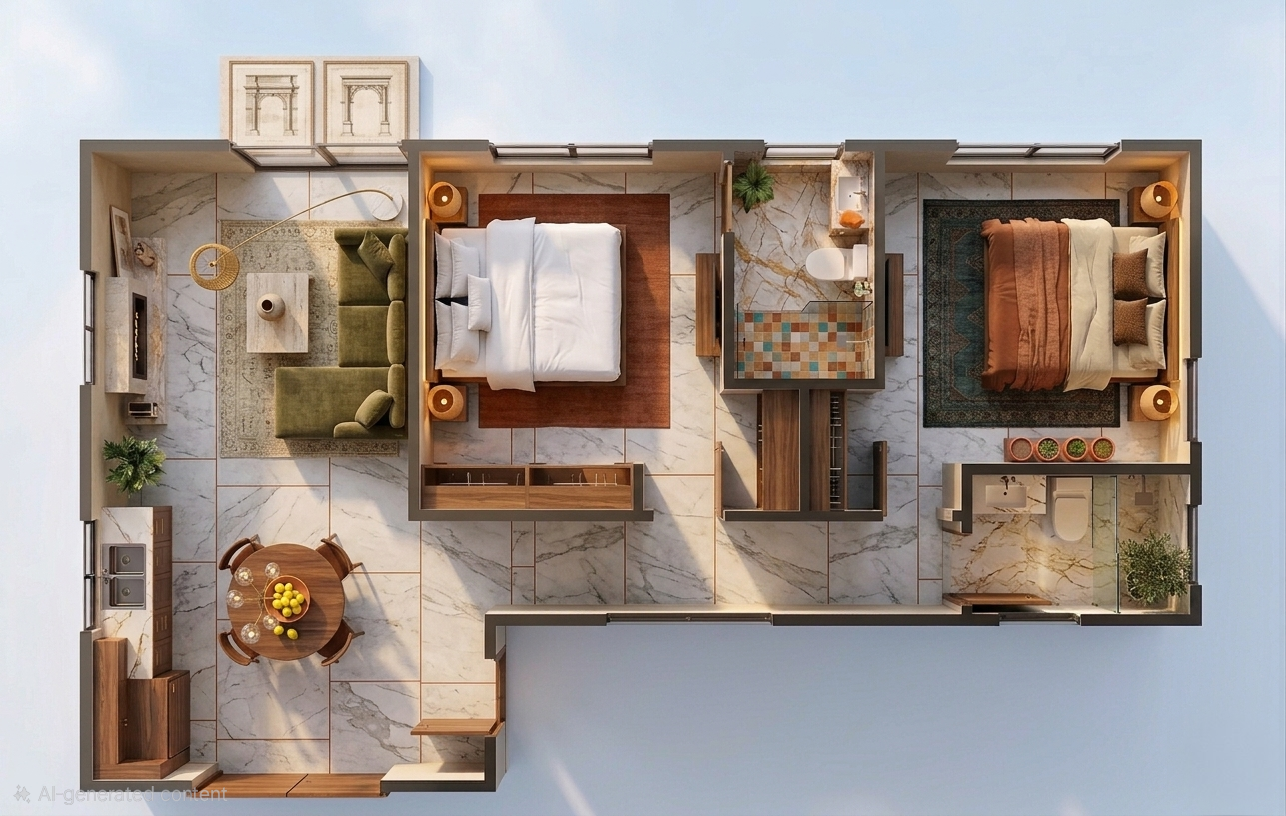
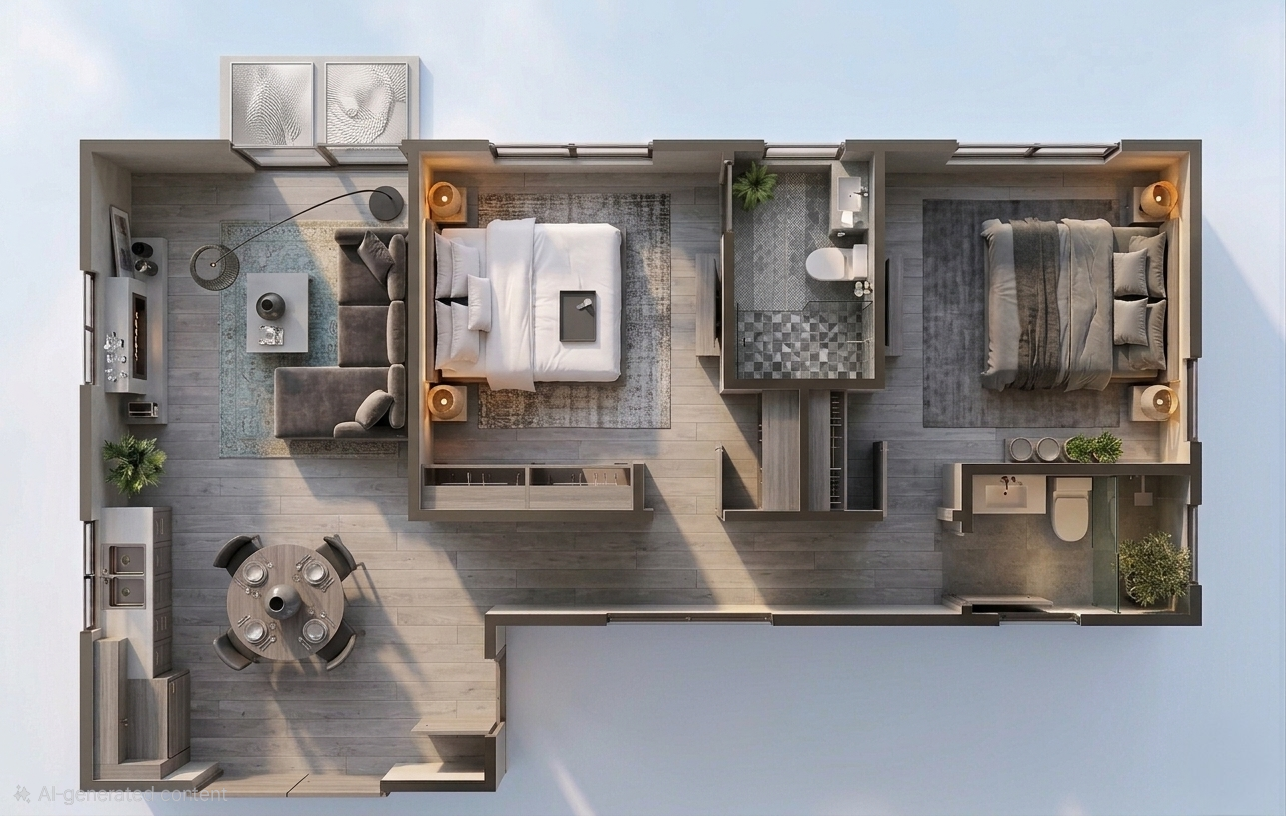
Each bedroom was designed at approximately 11’ x 12’ with:
- Full-height closets
- Large rear-facing windows for natural light
- Proper cross ventilation
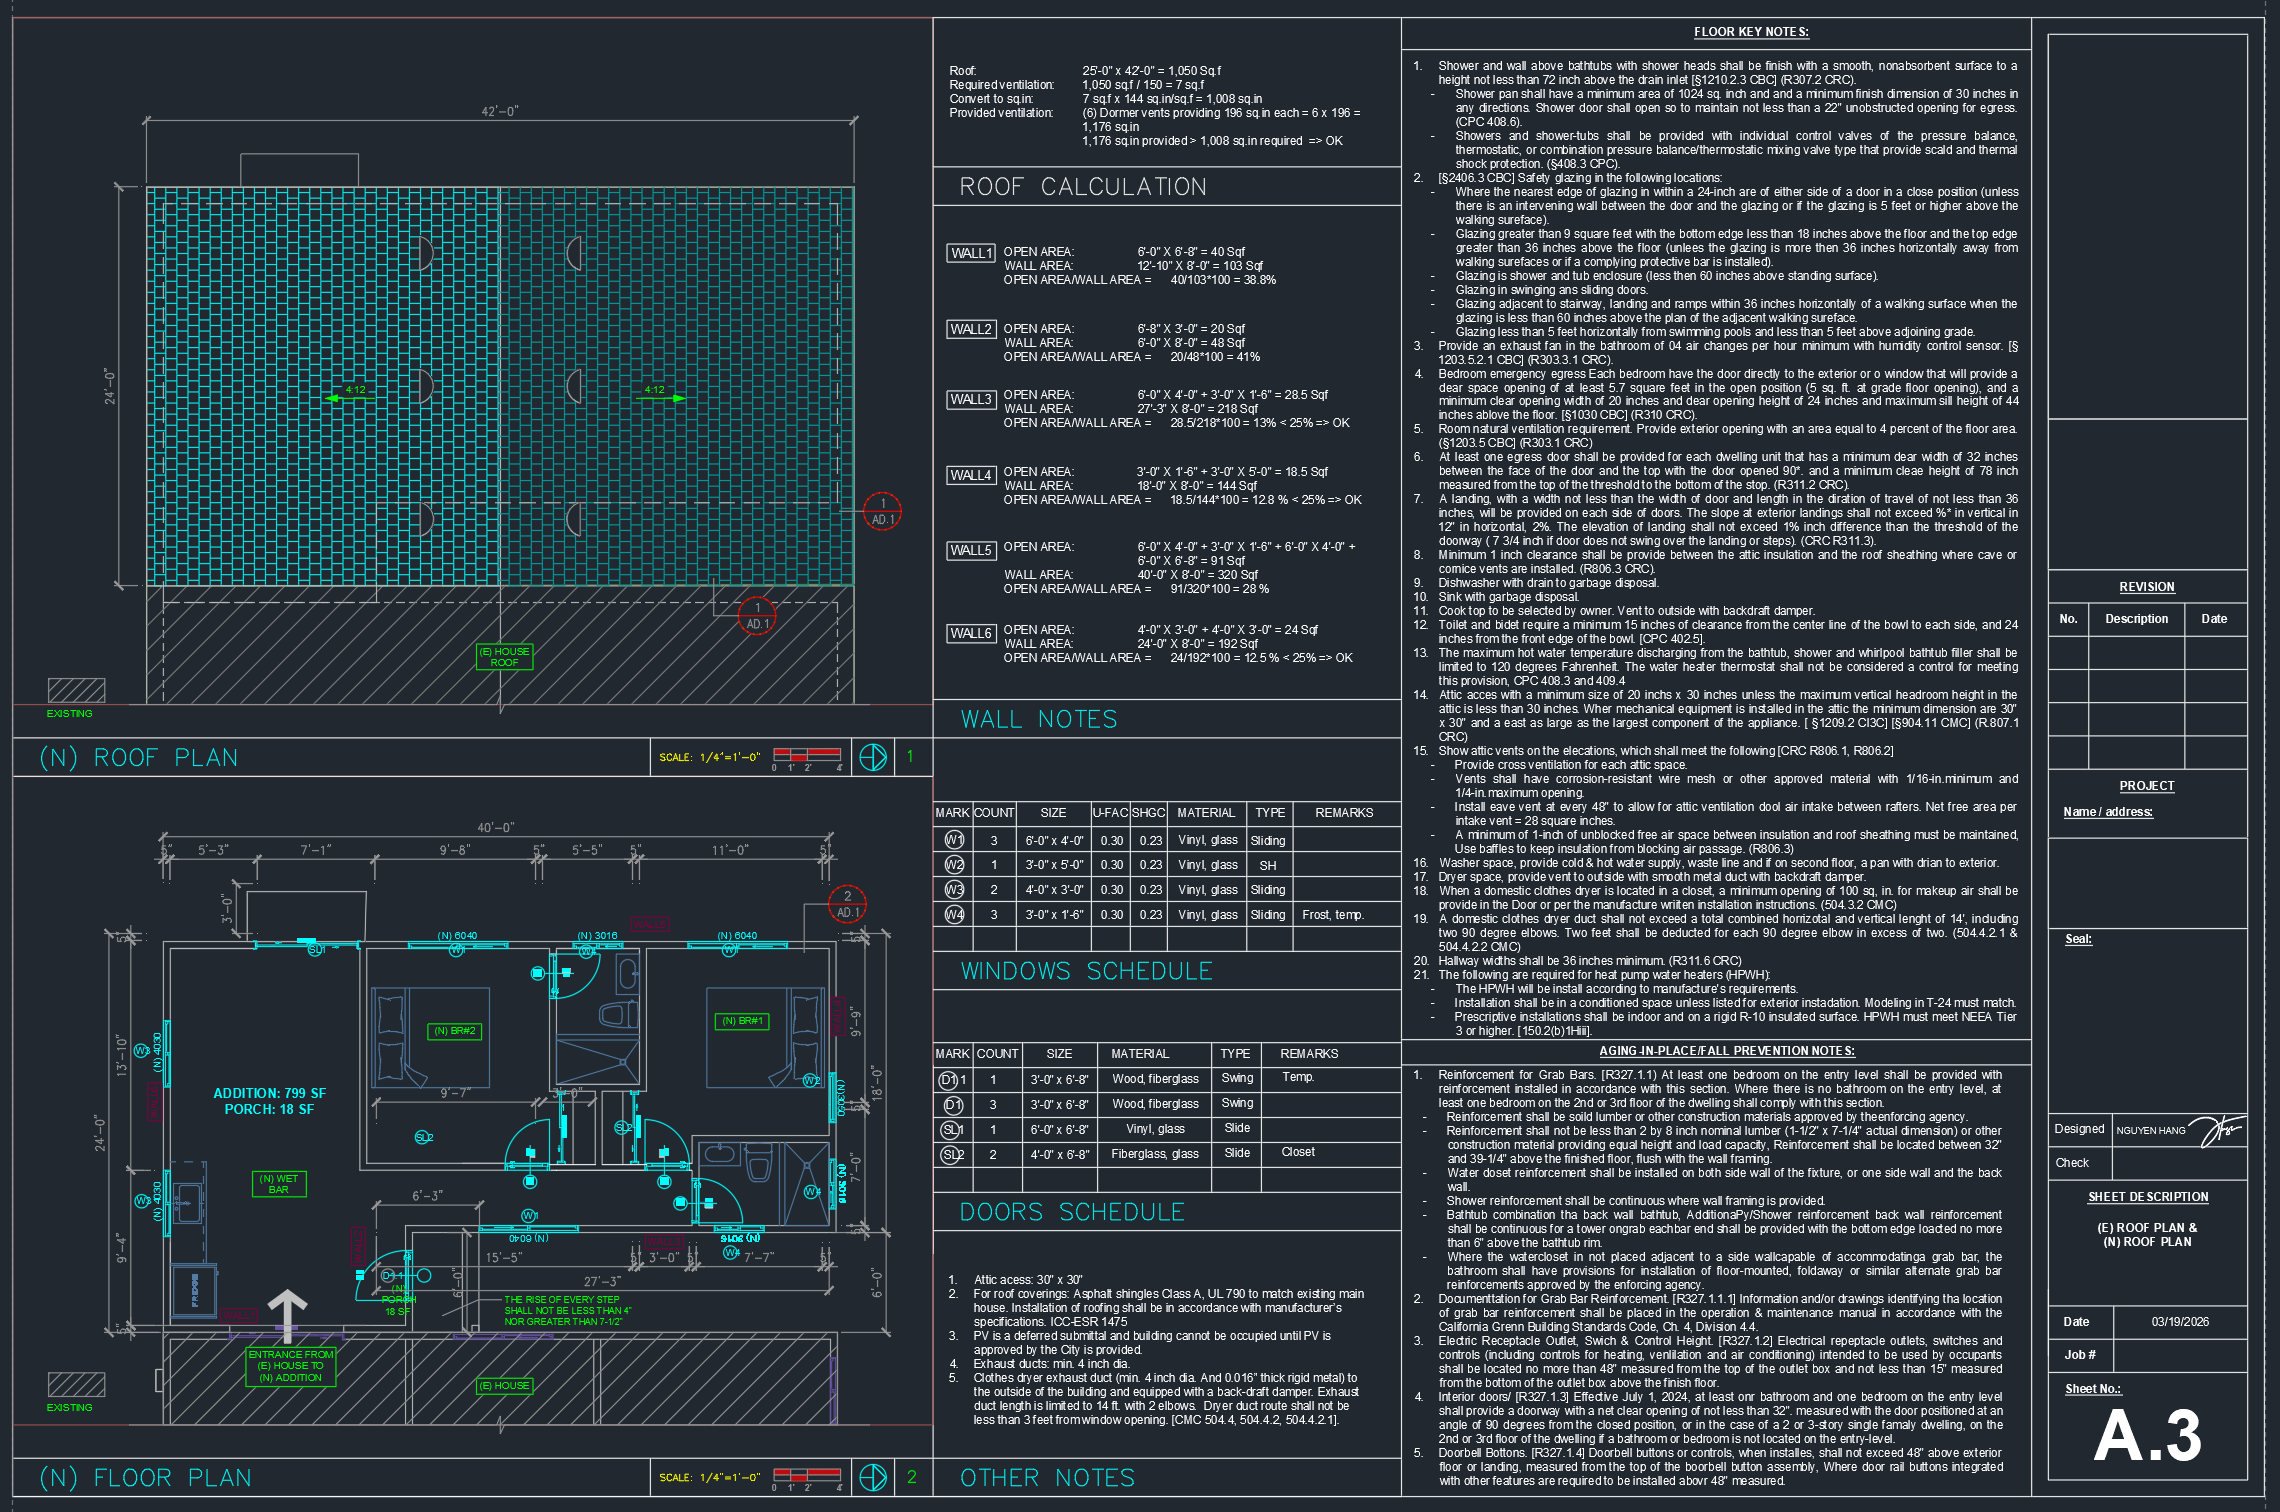
- Code-compliant egress openings
I ensured furniture layouts worked comfortably before finalizing dimensions.
Structural & Technical Coordination
Before finalizing the design:
- Verified foundation type and extended footing accordingly.
- Coordinated roof framing to tie into existing rafters.
- Ensured shear wall placement for lateral stability.
- Checked energy compliance requirements (Title 24, if in California).
Mechanical and electrical routing were planned early to avoid conflicts during construction.
3D Visualization
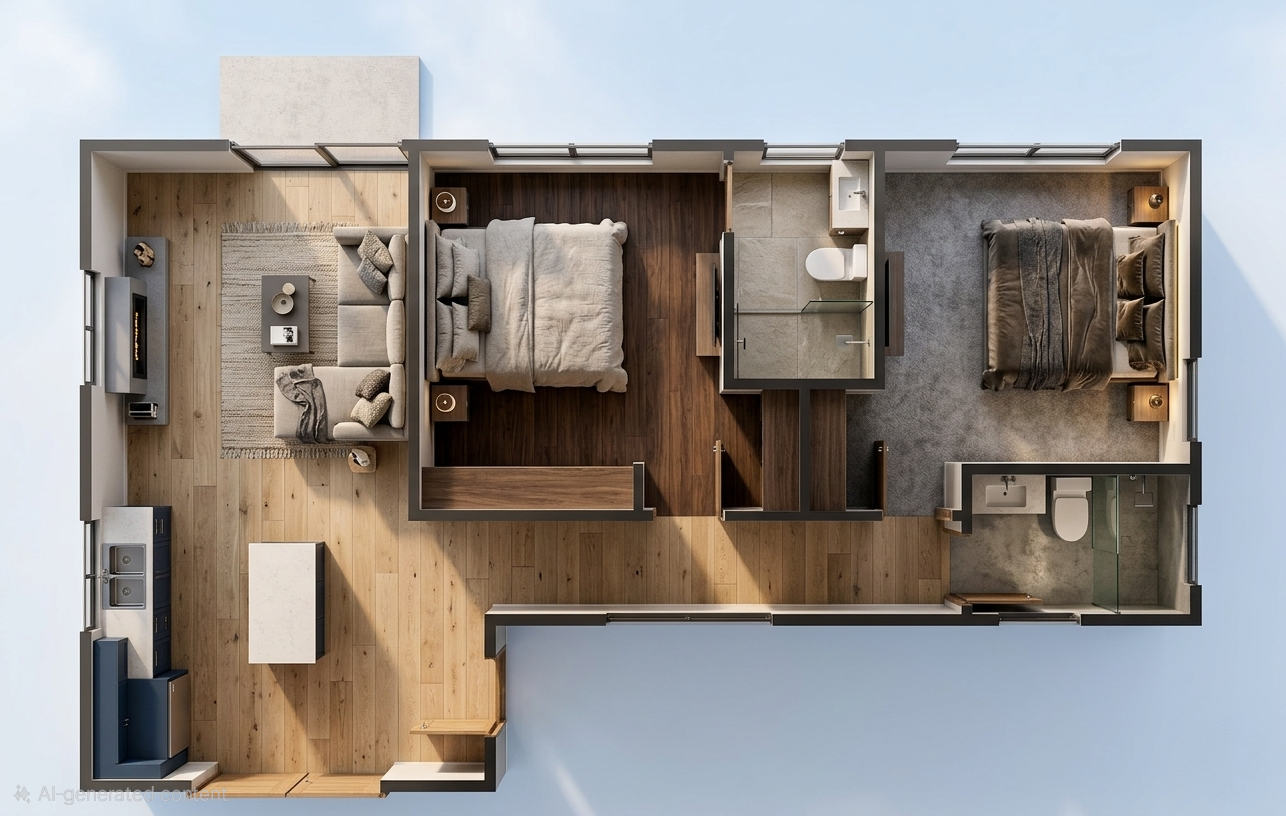
Once the floor plan was approved, I developed a 3D model to help the clients visualize:
- Exterior massing and roof integration
- Window alignment
- Interior proportions and natural light conditions
- Backyard impact
The 3D views were critical. The homeowners initially worried the addition would dominate the yard, but seeing the scaled model reassured them. It demonstrated that the structure maintained proper proportions and preserved usable outdoor space.
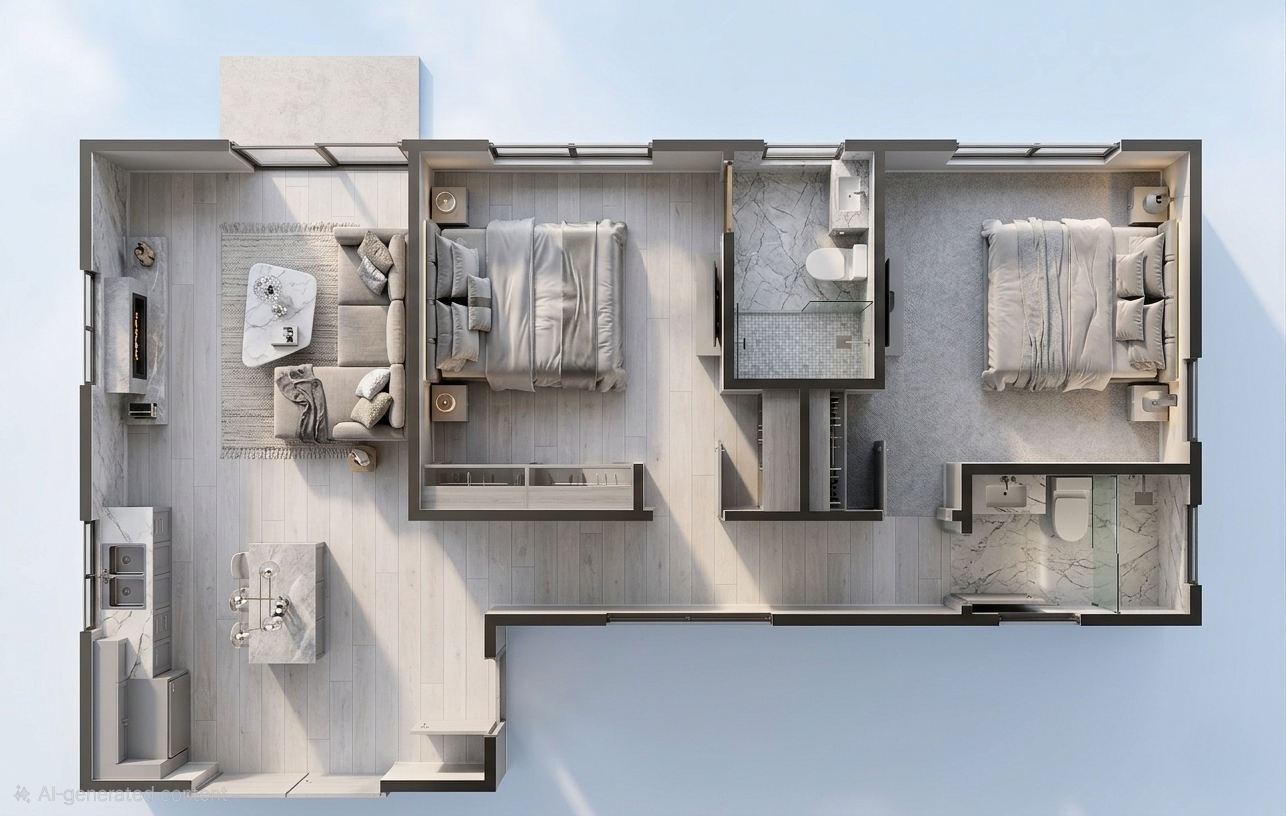
I also provided interior perspective views showing:
- Bedroom sightlines
- Window placement
- Ceiling continuity
- Material transitions
Visualization reduced uncertainty and strengthened client confidence.
Final Deliverables
The completed drawing set included:
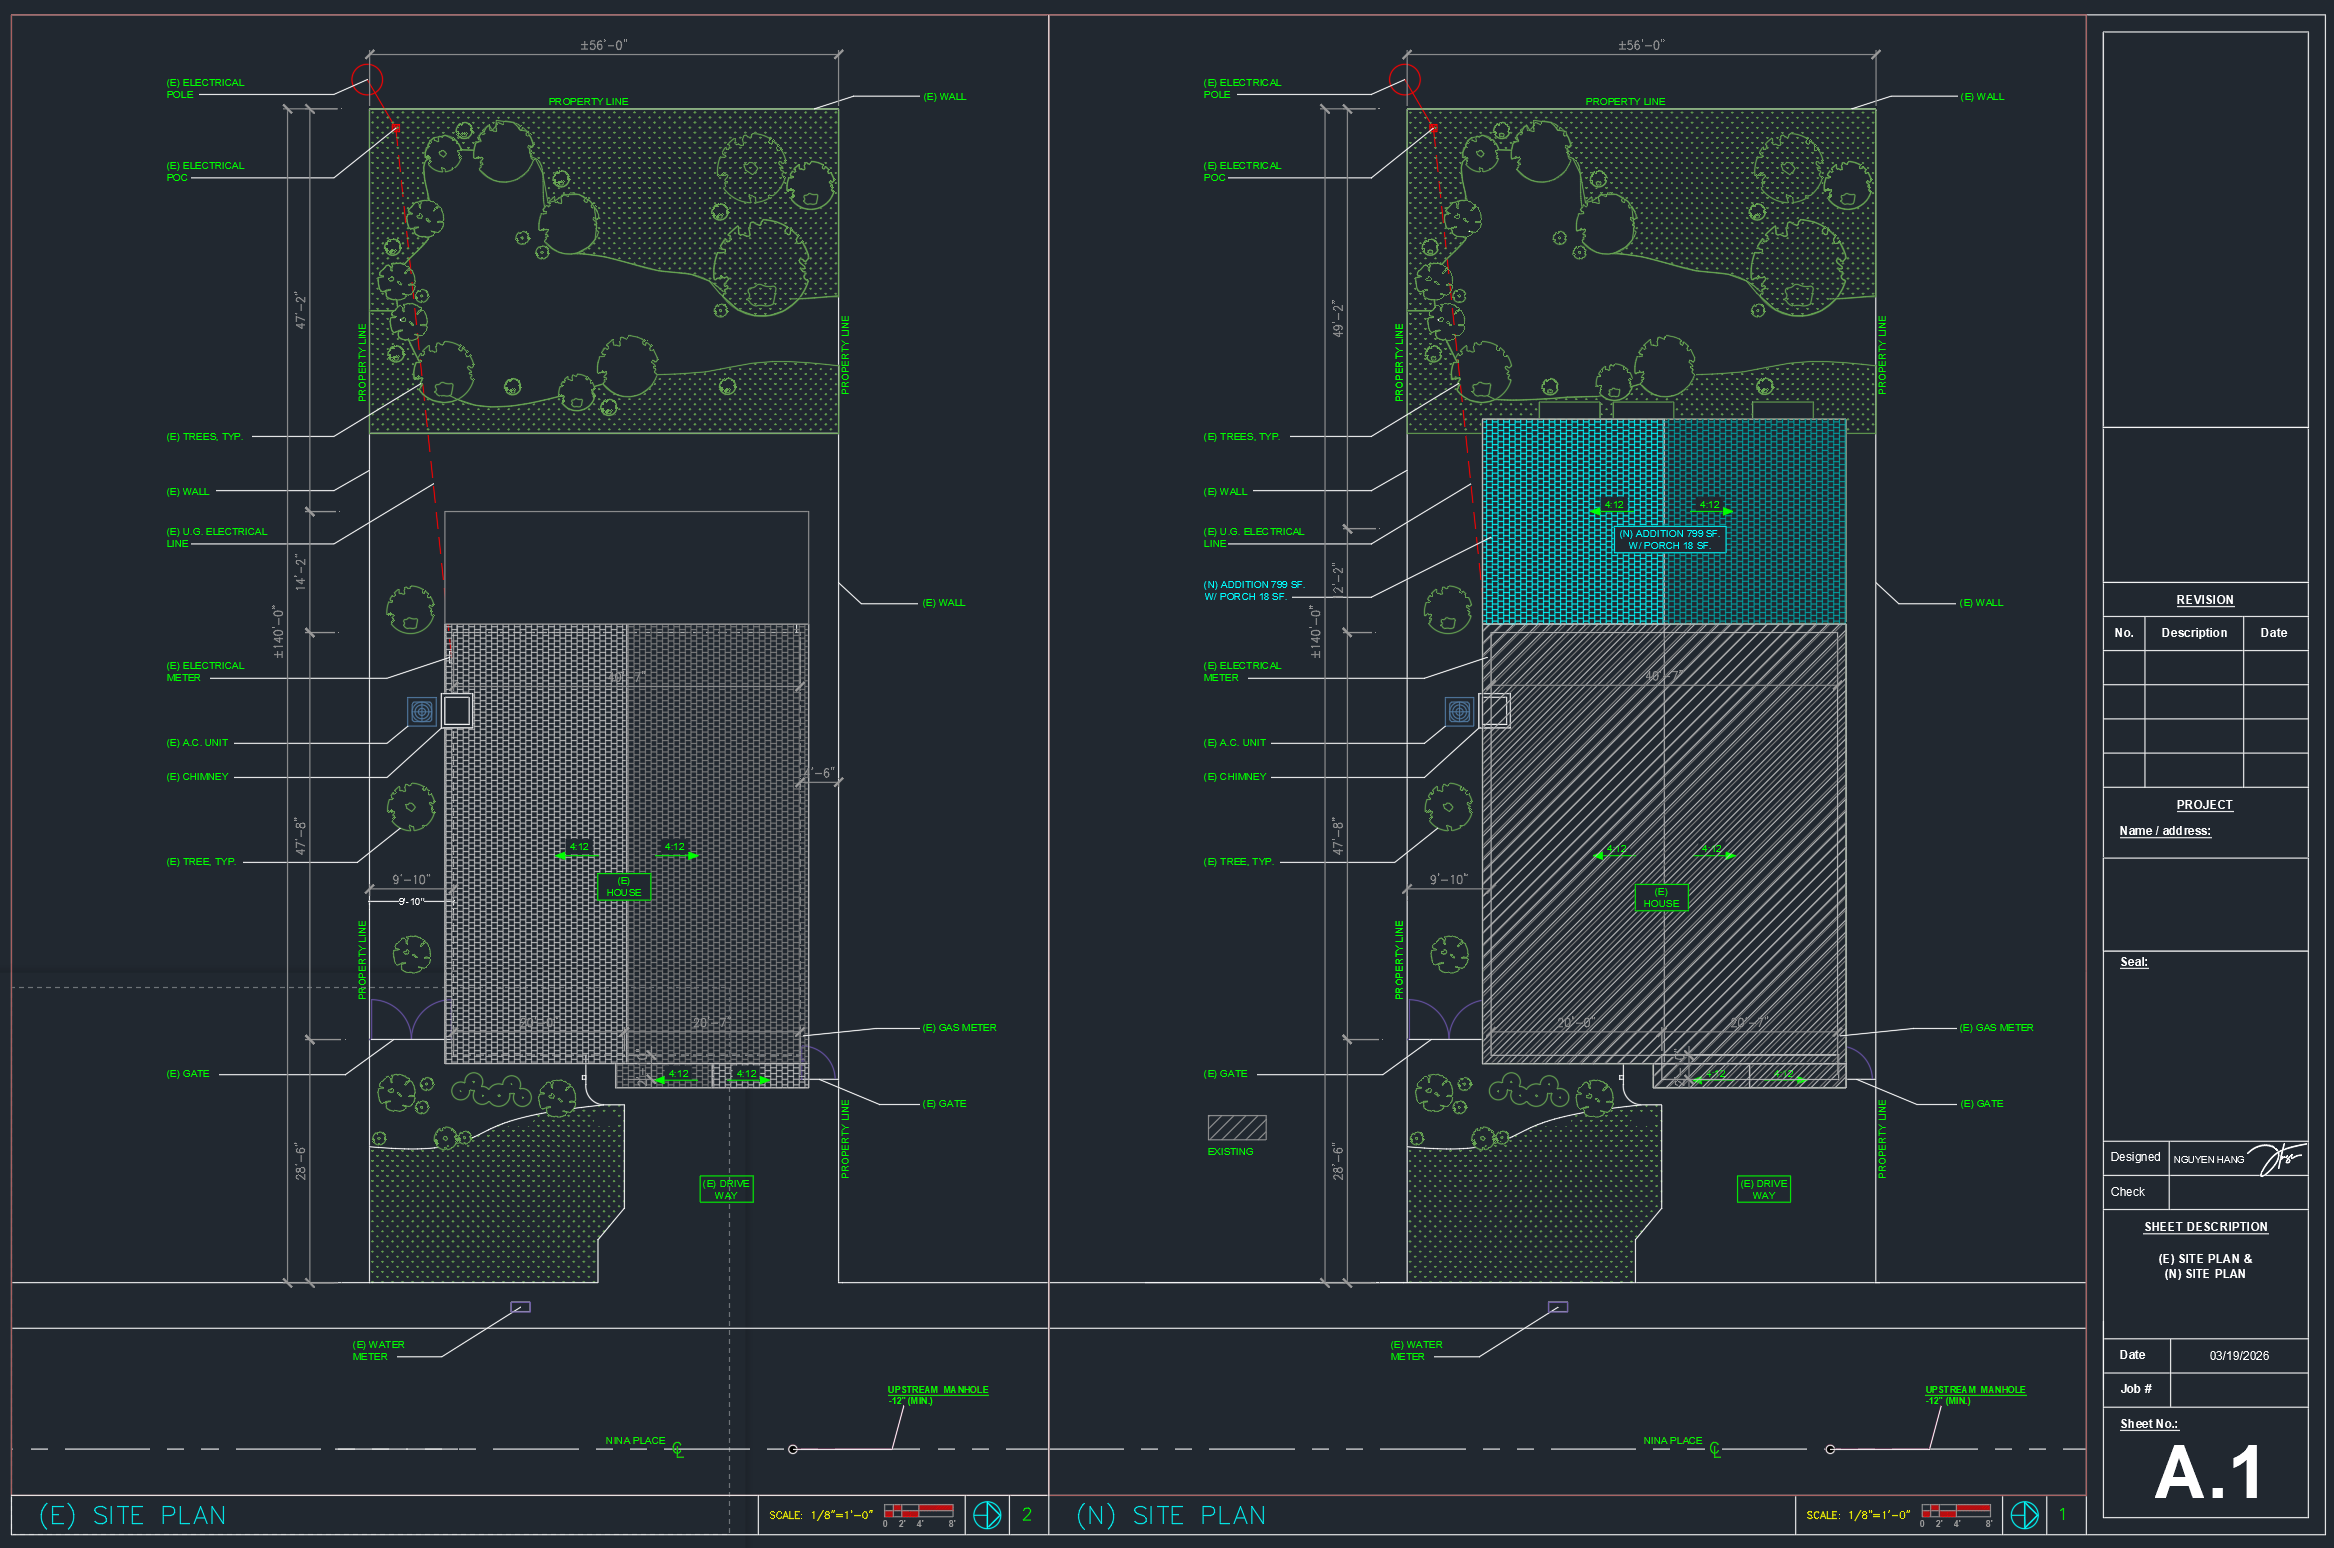
- Site plan
- Demolition plan
- Proposed floor plan
- Exterior elevations
- Roof plan
- Building sections
- Structural details
- Foundation plan
- Electrical layout
- 3D renderings
Reflection
What defines a successful residential addition is not square footage—it is continuity.
When construction finished, the addition did not look like an expansion. It felt inevitable, as if the house had always intended to grow in that direction.
That is the role of thoughtful architectural design:
Not simply adding space, but extending a home’s story with structural clarity, spatial logic, and visual harmony.
Cheers!!
